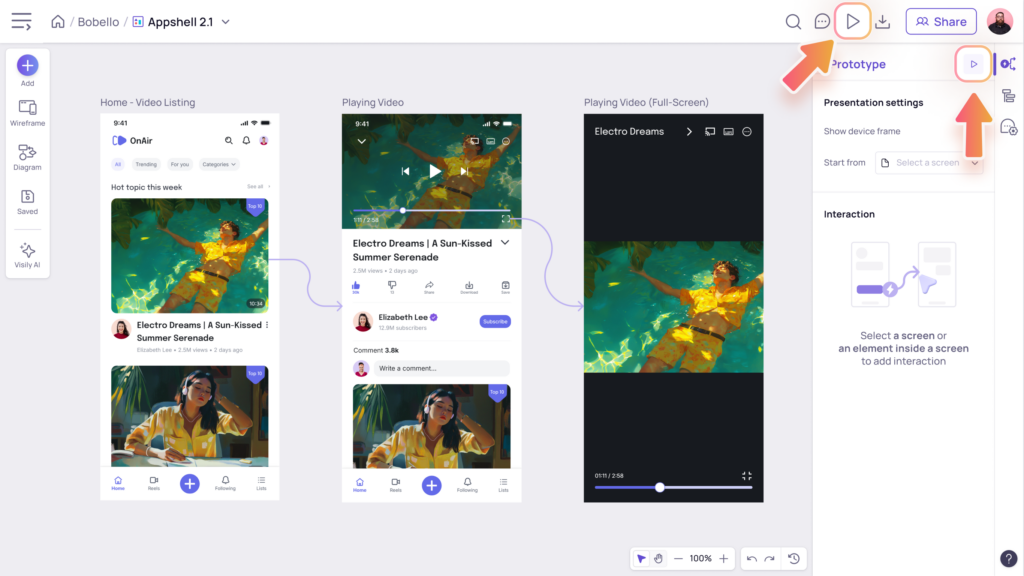
Visily’s prototype mode allows you to create interactive app flows. You can add interactions by connecting a component or a screen to another screen and showing the user journey.
Create your Prototype
Open the Prototype mode
To access Prototyping mode, click the “Prototype” icon on the top bar of the working screen.

Add interaction to an element
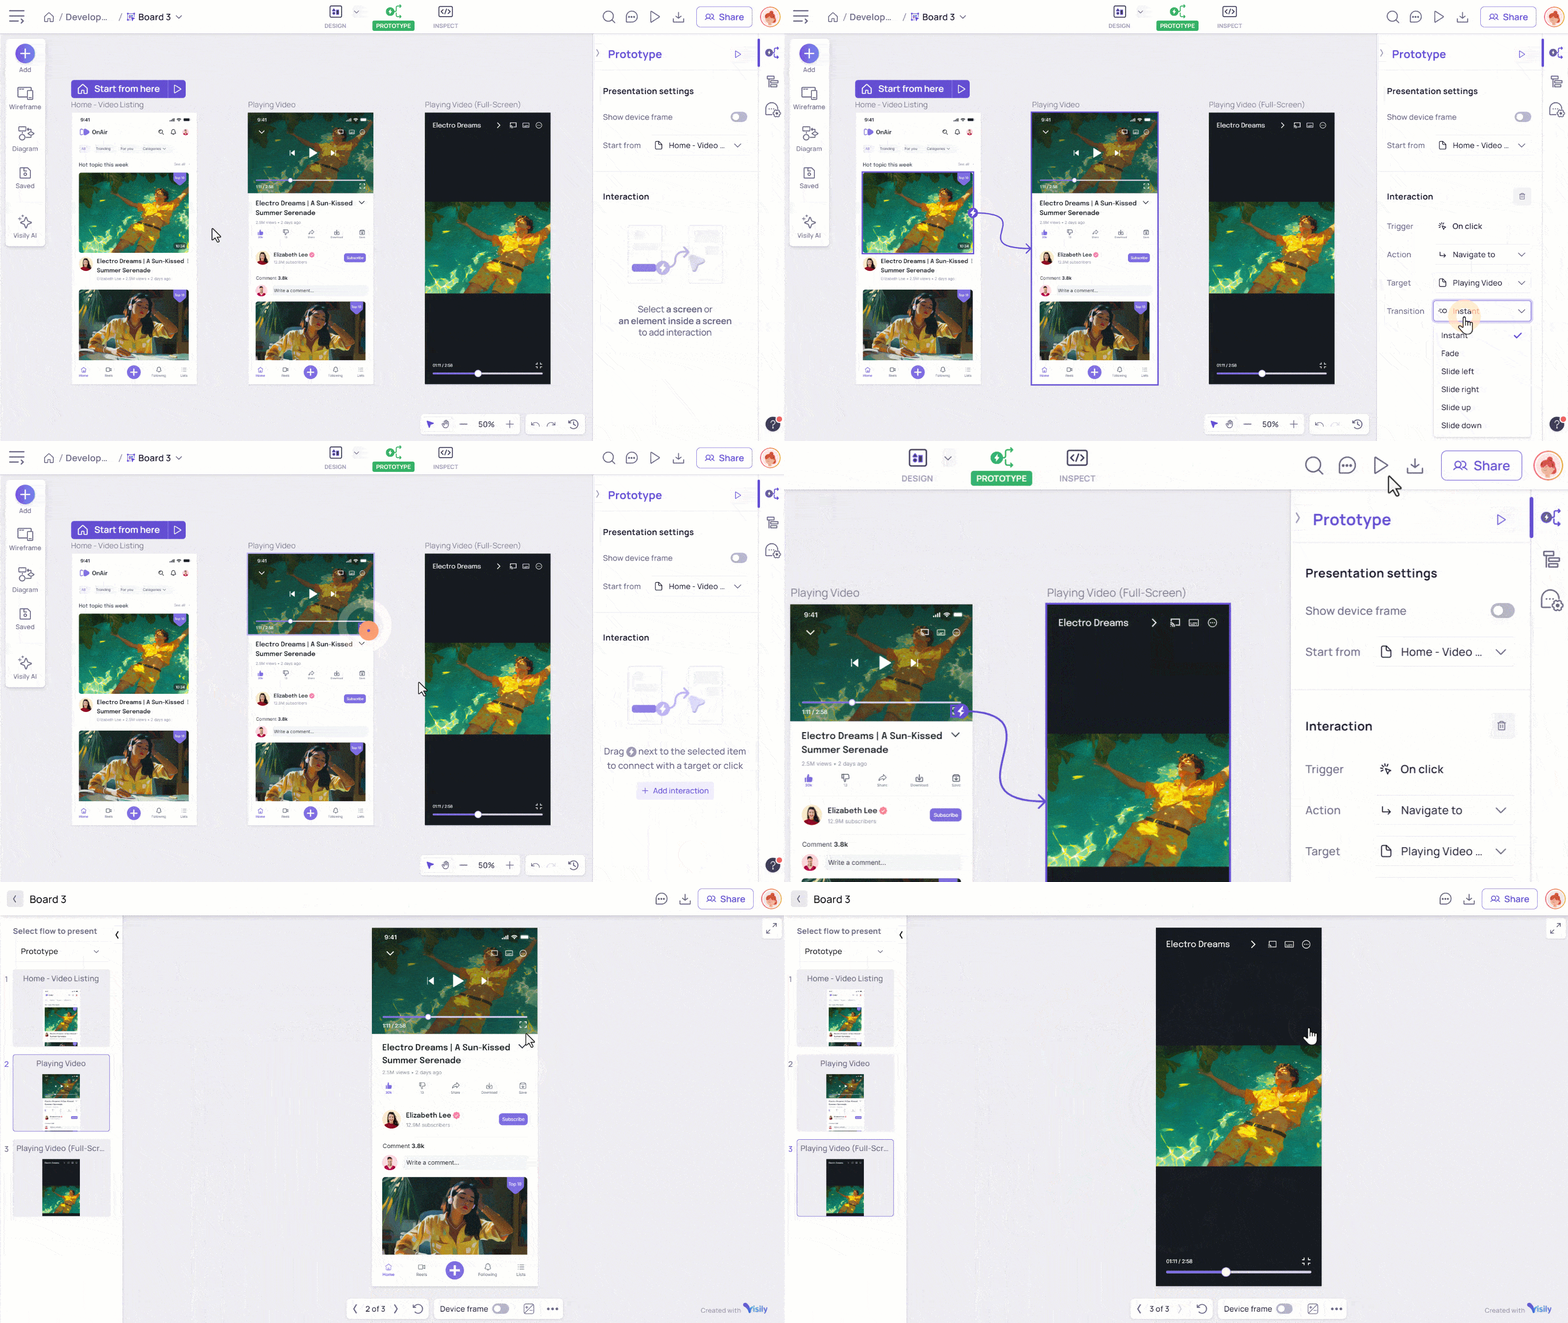
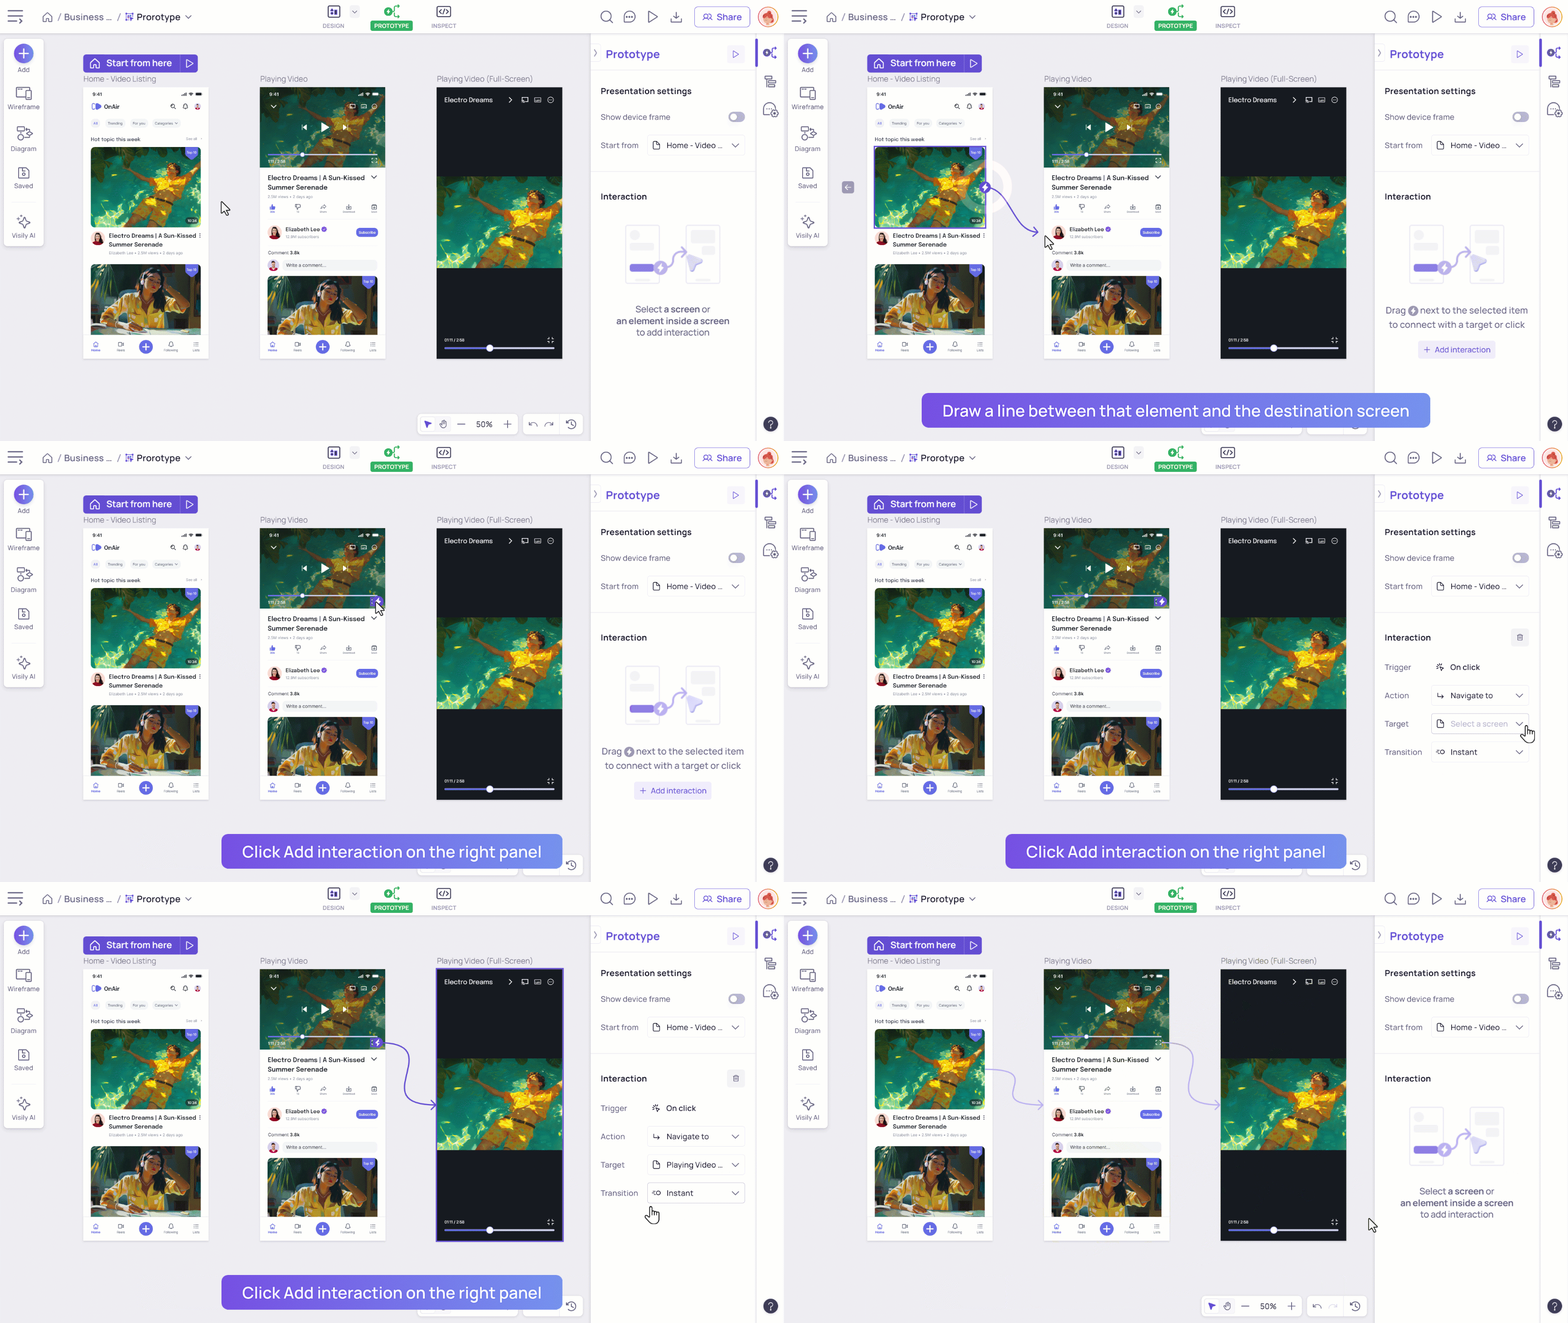
You can select an element to add an interaction to in 2 ways:
- Draw a connecting line between that element and the destination screen
- Click “Add interaction” on the right panel to select the interaction type and destination screen

Customize an interaction
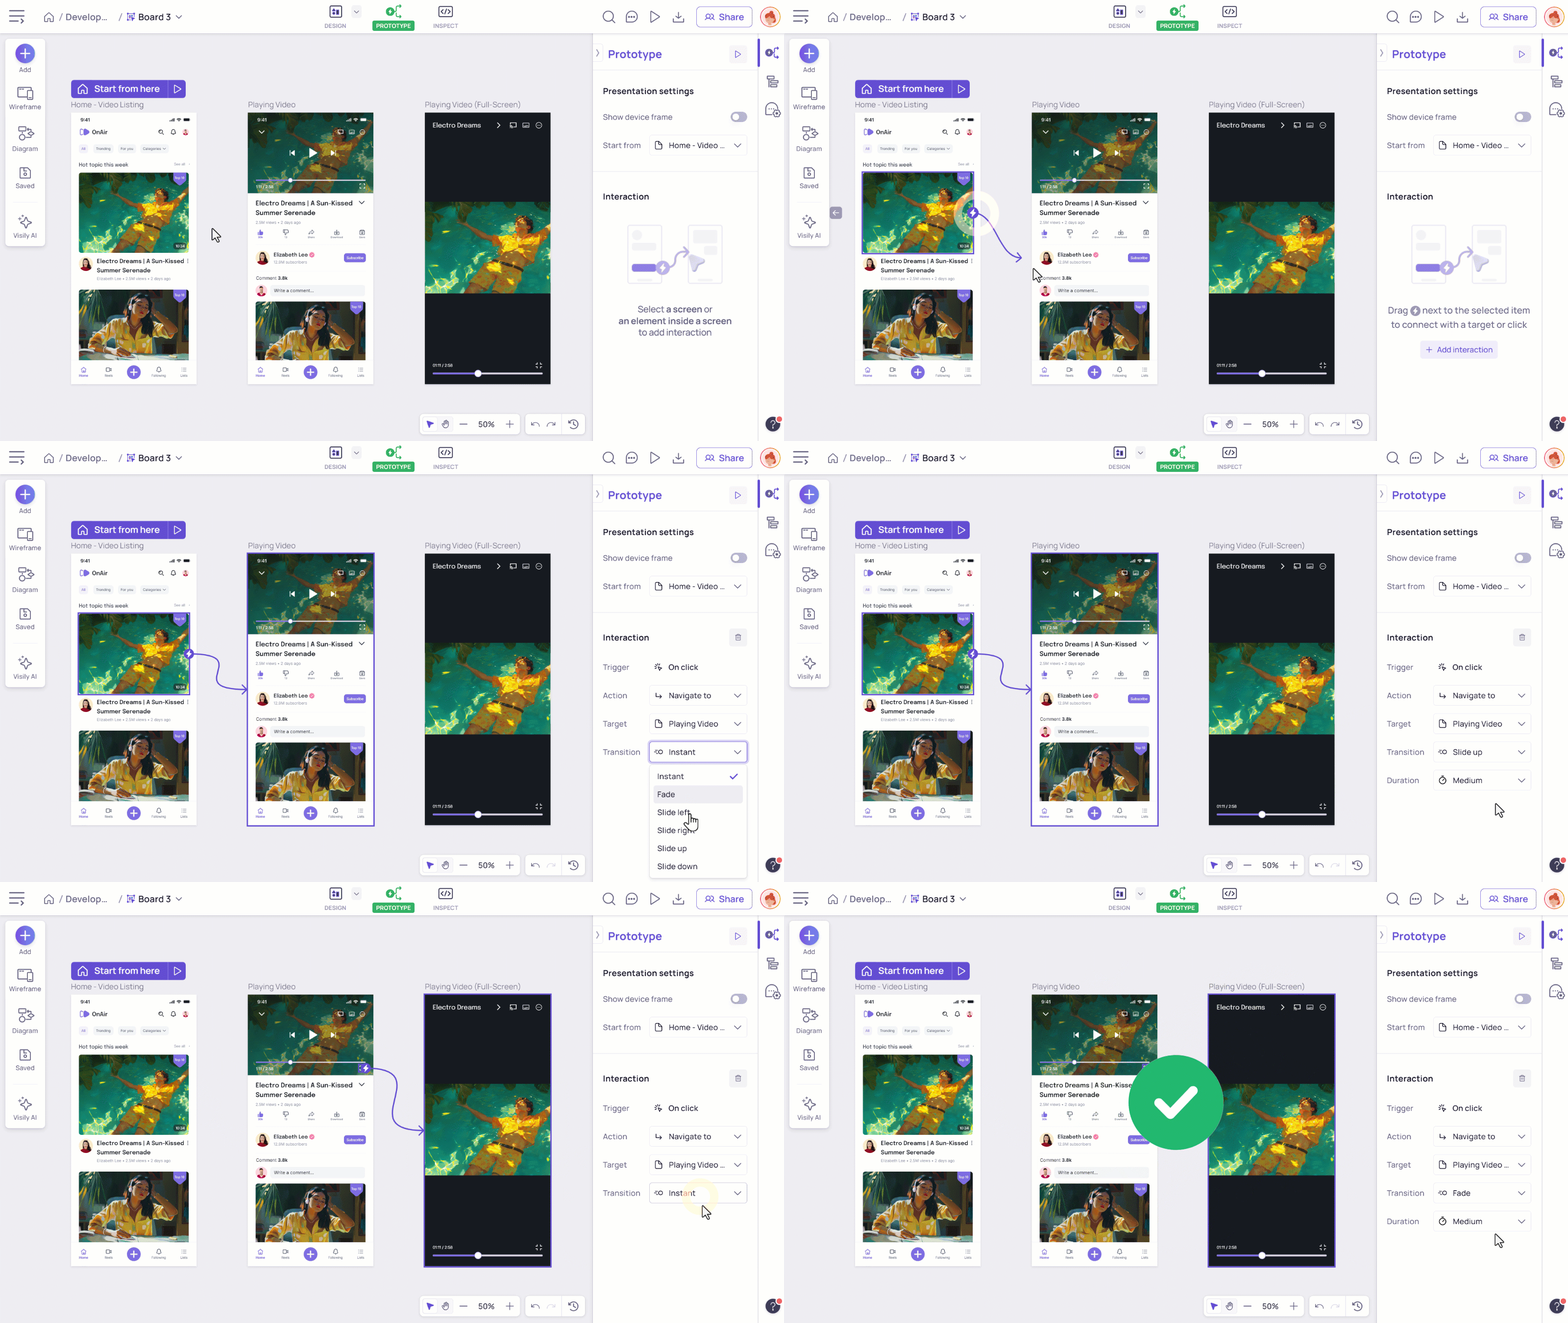
Once you create an interaction, you can personalize it using the Prototype side panel on the right. Here’s a quick guide:
- Trigger: Triggers the action when the user clicks or hovers on a hotspot in your prototype.
- Action: Choose from 3 types of interactions: Navigate to a specific screen, Go back to the previous screen, and Open overlay/popup
- Target: Decide where the interaction ends, such as another screen in your prototype. Note: “Go back” action will return to the previous screen automatically.
- Transition: Select how the prototype moves to the next screen: Instant, Fade, Slide left, Slide right, Slide up, or Slide down
- Duration: Set how long the transition takes in milliseconds (ms): Fast (100 ms), Medium (300 ms), Slow (600 ms)
Set up your Presentation flow
Choose a Home screen to start your presentation
To set a screen as a Home screen, or the starting point when you present the app flow, simply select that screen and click “Start from here” button.
You can change the Home screen to any screen you want by following the above steps, as well.

Select Device frame
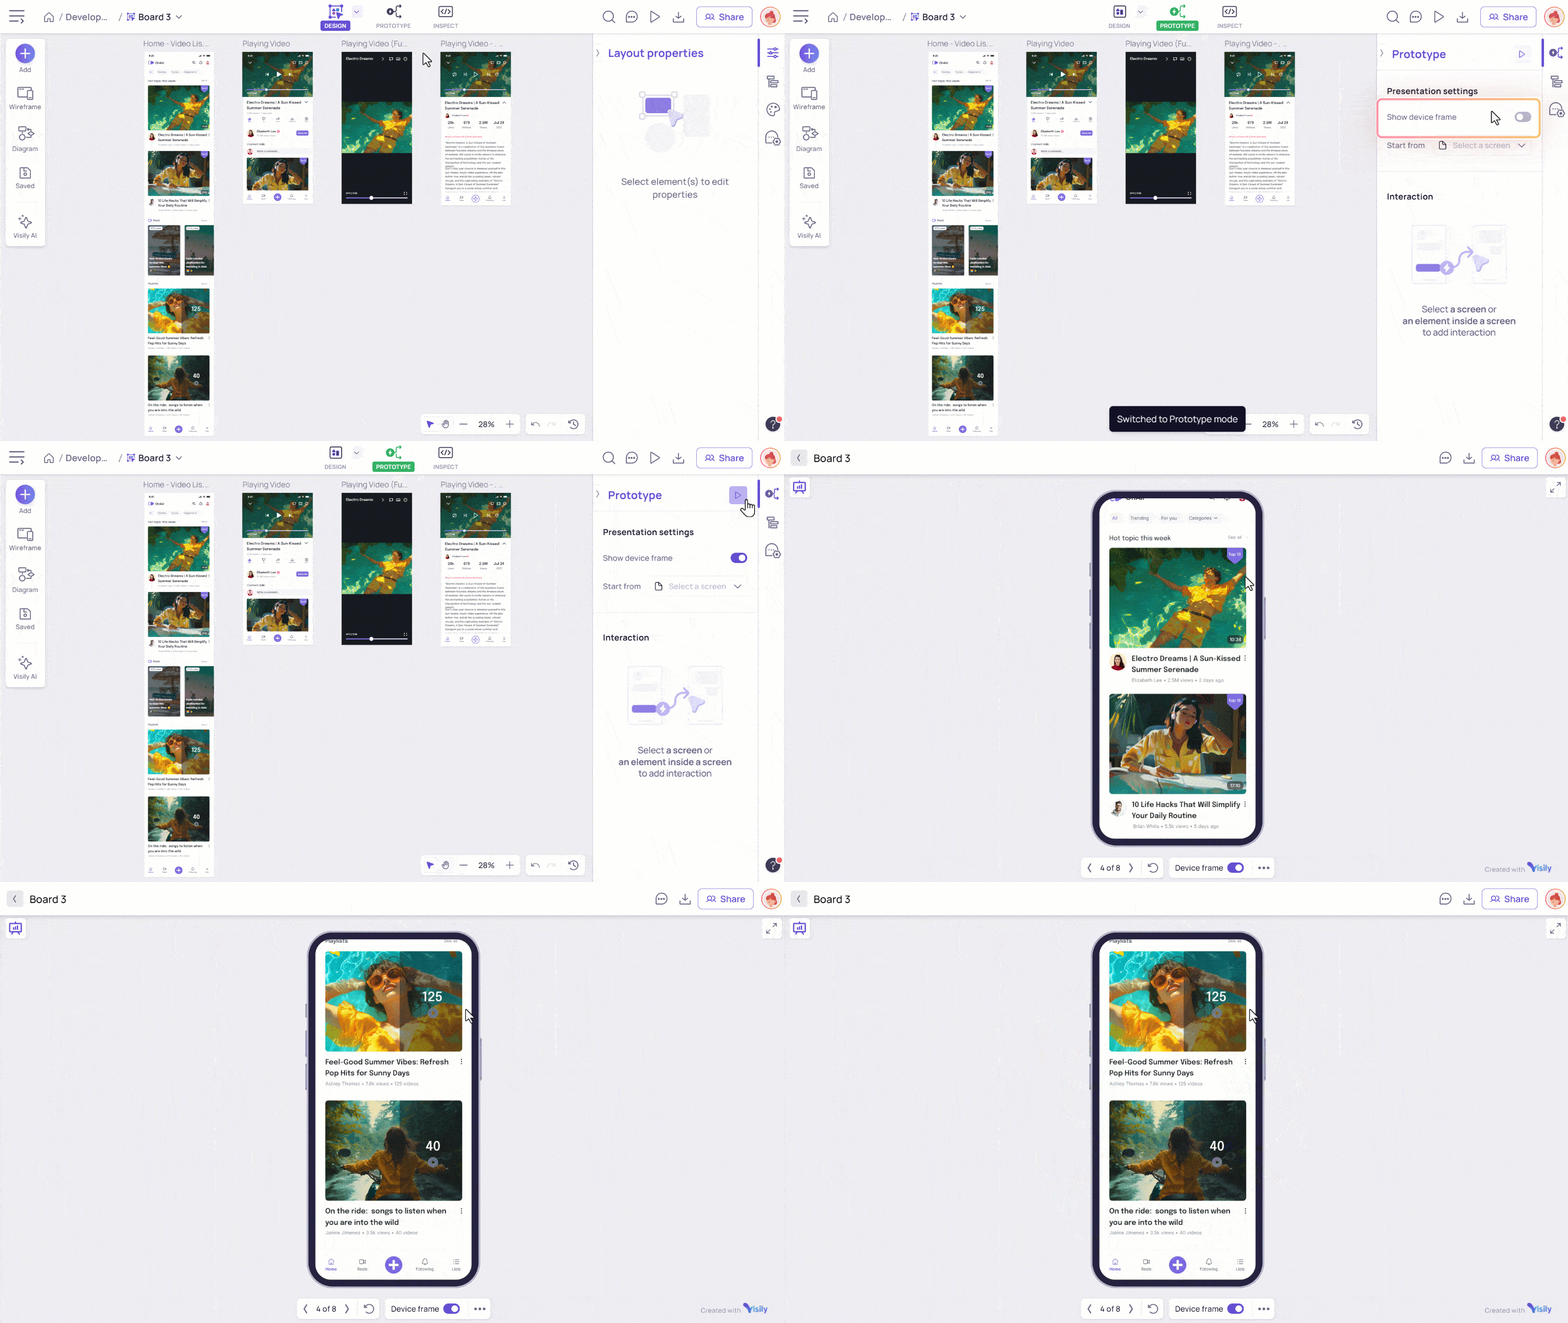
To set prototype device, turn on the device toggle in the prototype panel. Visily will automatically detect the screen type to show your design in a suitable device. Currently, Visily offers two types of devices: Mobile and Laptop.
When you click to present the prototype, you’ll see the device frame when you play your presentation.
Present your prototype
Once you’re ready to present your prototype, simply “Present” to enter Presentation mode in either of these places:
- On the right side of the top bar.
- In the Prototype side panel.
For further information on how to present your prototype, learn more here.
